Defining Print Areas and Ensuring True-to-Size Prints in Qstomizer v3.
This guide explains how Qstomizer maps pixels to real-world units and how to configure templates so that downloaded designs match the intended physical dimensions. We’ll cover the concept of DPI/PPi, how Qstomizer uses measurement tools and scale factors, and step-by-step how to set up templates and print areas. For example, if you need a 14.8-inch print area on a shirt at 300 DPI, this tutorial shows exactly how to get the correct pixel output. We draw on Qstomizer’s v3 documentation ( link, link), technical examples, and practical tips to make sure your customers’ previews and the final prints are true-to-size.
Understanding Pixels, PPI (DPI), and Print Size.
Digital images consist of pixels, and printed size depends on how many pixels per inch (PPI or DPI) are used. The basic formula is:
For example, an image 1500 pixels wide at 300 DPI prints as 1500/300 = 5 inches wide ( link). Because Qstomizer downloads images at 72 DPI by default, a 720x720 px design prints as 10×10 inches (720/72). To print larger dimensions (e.g. 10×10 in at 300 DPI requires 3000×3000 px), you must supply more pixels. In Qstomizer, you achieve this by scaling up the design before downloading (see below).
Key Point:
You must calculate required pixel dimensions as (desired print inches × desired DPI). Then use Qstomizer’s scale tool to achieve that many pixels. The DPI value in the downloaded file will remain 72, but scaling effectively produces the needed resolution. (See formula here.)
In practice, high-quality print usually uses 150–300 DPI. A high-detail shirt print often targets ~300 DPI. This means: Pixels needed = (print size in inches) × 300. For instance, a 15×10 in design at 300 DPI needs 4500×3000 px. Since Qstomizer’s design canvas is limited to 800×700 px, you would define a smaller base area and then download at a scale factor to reach 4500×3000 px. See “Downloading Designs” below for examples.
Setting Up the Product Template and Print Area.
When creating a product template in Qstomizer, the merchant uploads a product mockup image and defines the print area. This determines what part of the image customers can customize. Follow these steps:
- - Upload the base image (and optional mask) in the Qstomizer template. Ensure the image has the correct proportions of the real product (e.g. shirt dimensions ratio). (If using a pre-made template, this step may be done already.)
- - Calibrate real-world size using the ruler tool: Before drawing the area, select the measure unit (inches, cm, etc.) and drag the built-in “ruler” line on the product image to span a known distance. In the popup, type the actual measurement of that distance link. This tells Qstomizer how many pixels correspond to real units. For example, drag the ruler across the chest width (say 20 inches) and enter “20 in” here. This calibration is crucial: it fixes the scale so that subsequent shape dimensions reflect real sizes. Without this step, Qstomizer cannot know the true physical size of any pixel on the image.
-
- Define the print area shape: After calibrating, use the shape tools to draw the printable area. Qstomizer offers polygonal, rectangle (with optional rounded corners), or circular shapes. Drag points or corners to enclose the region that will be customized. For example, a rectangular front-print area might be drawn as shown below. The interface will display the exact pixel size and position of the shape (e.g. “Size: 196×253 px” image below) as you adjust it:

In Qstomizer’s template editor you draw and size the print area on the product image. The example above shows a square print area being defined (Size: 196×253 px - image above). You can choose circle/square/polygon and adjust corner radius. The live overlay shows the area’s pixel dimensions and position. - - Save the template: Once the print area is correct, save the template. You can always edit an existing template to correct the area by using the Change Print Area or Edit Print Area function (as shown by [9], [37]). This allows you to adjust the shape and re-calibrate as needed, without re-uploading images.
Best practices for product mockup images:
Always use clear, to-scale mockup images. The image’s DPI metadata does not automatically set the scale – you must use the ruler tool to define scale. It’s safest to use images at 72 DPI (default) and the correct pixel dimensions so that 1 pixel really represents 1/72 inch before scaling. If your mockup is not at 72 DPI or was created at a different scale, definitely use the ruler calibration step to avoid confusion. Once the ruler is set, Qstomizer will display distances in the chosen unit accurately on-screen. If you skip calibrating, specifying “14.8 in” in the print area will not match reality, because Qstomizer doesn’t know how those inches relate to the pixel size of the image.
Downloading the Customized Design at the Desired Size.
When an order comes in, the merchant can download the customer’s design from Qstomizer’s backend. The download will produce an image in pixels (JPEG or PNG). Several points are important:
- - Default resolution is 72 DPI: The file’s metadata will typically be 72 DPI, and 72 pixels = 1 inch according to that. This is fixed by Qstomizer’s output. So if you download an image that is 1440 pixels wide, Qstomizer labels it as 20 inches wide (1440/72).
- - Resolution limited by user uploads: Qstomizer does not generate detail beyond what customers uploaded Ref.. If a customer used a 72 DPI image, you cannot magically get 300 DPI quality. The maximum DPI of the final design is the minimum DPI among all source images Ref..
-
- Use the scaling (zoom) tool to increase pixel size: The Qstomizer download dialog includes a Scale dropdown (from 1x up to 10x). Selecting a higher scale multiplies the pixel dimensions of the design Ref. For example, in the interface below, 1.7x means the output image will be 1.7× larger in pixels:
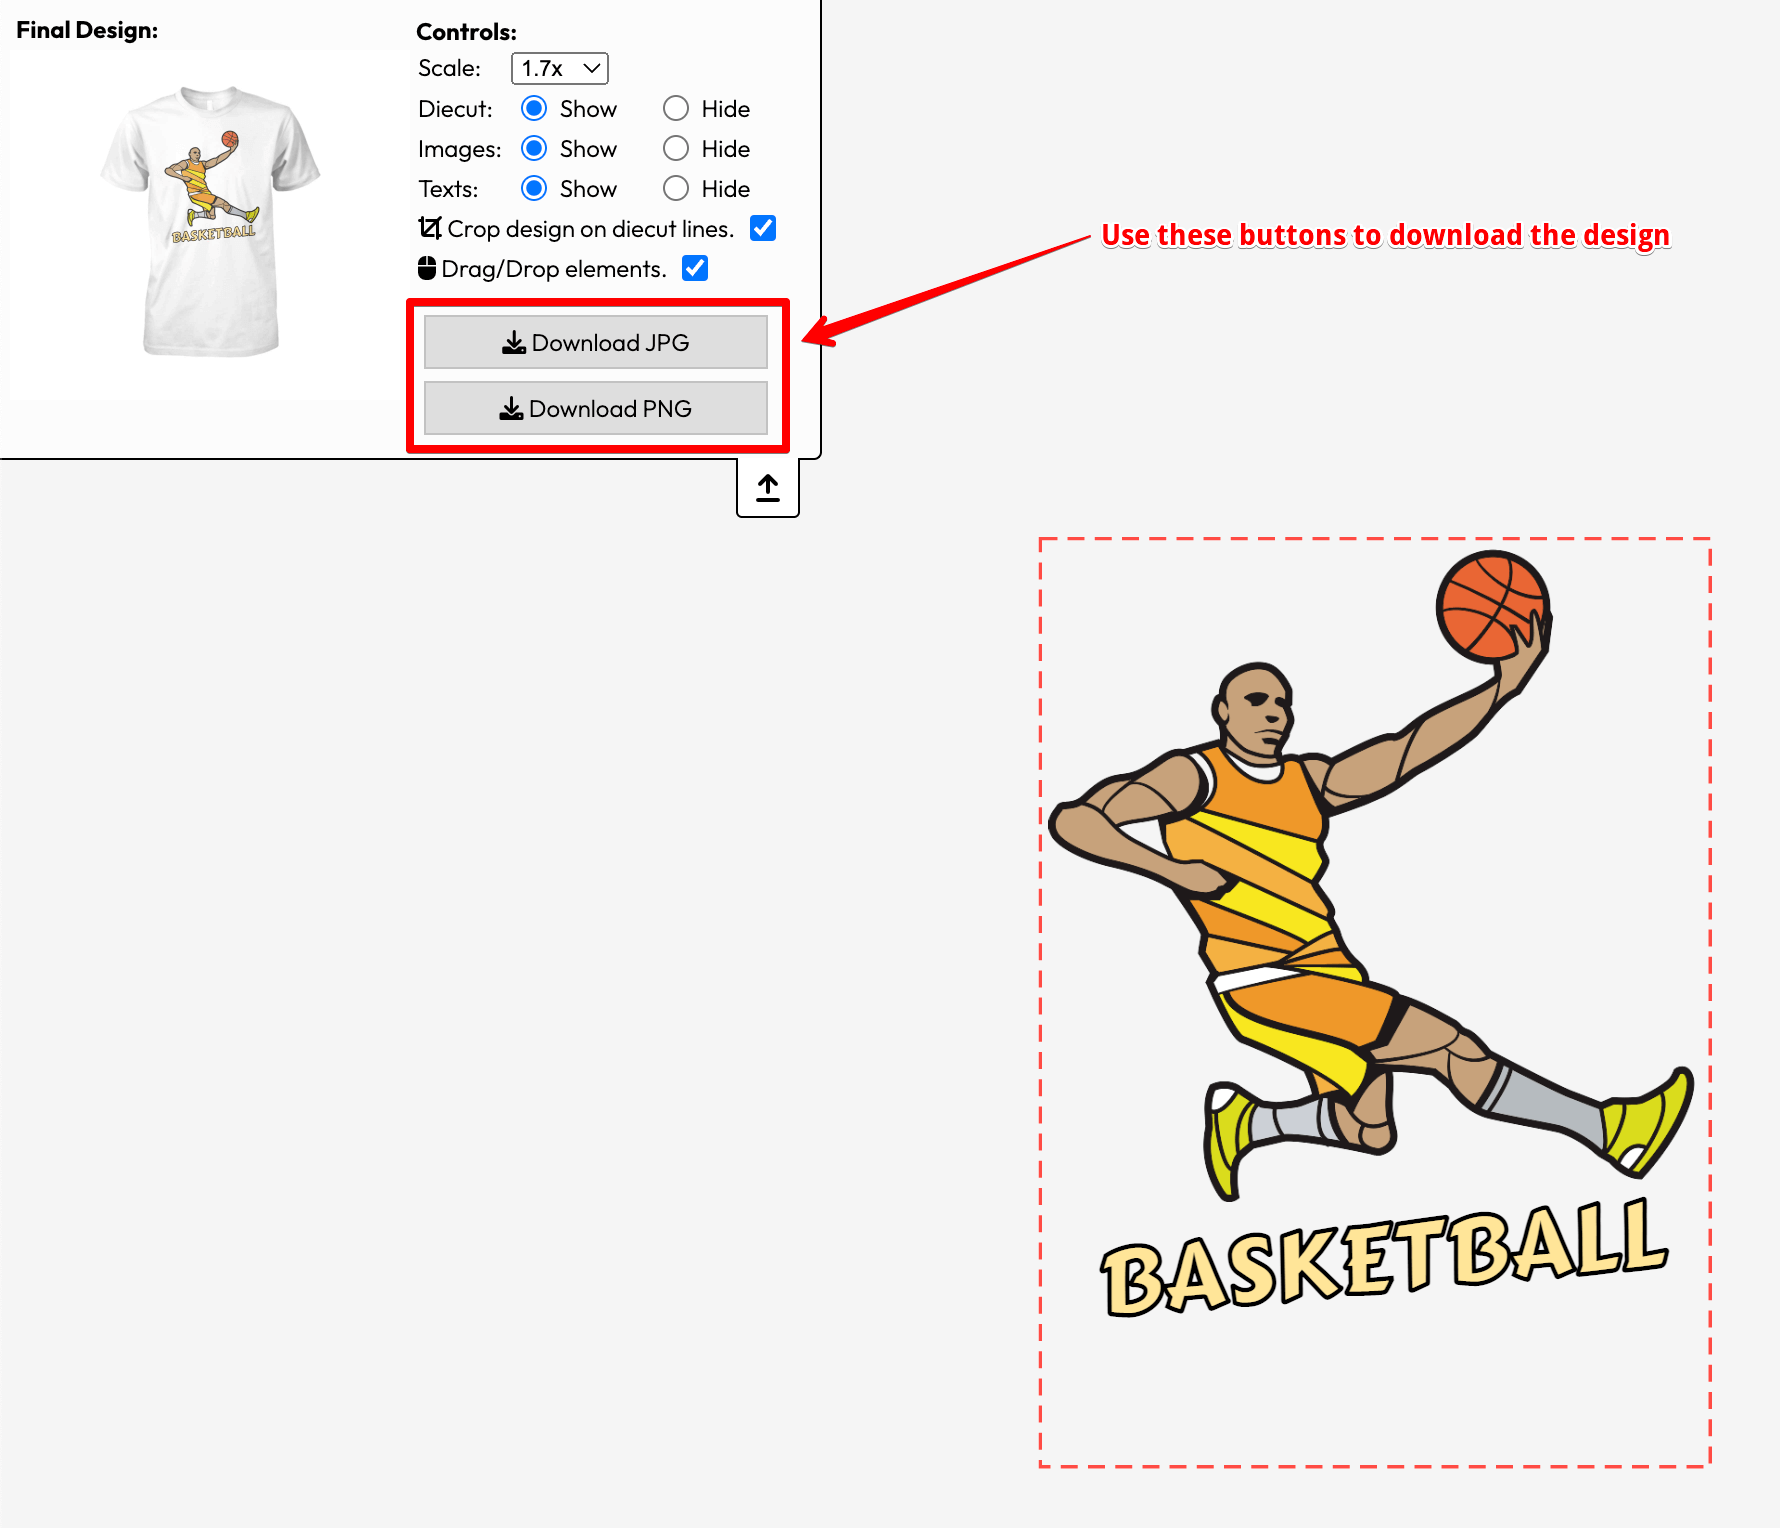
Qstomizer’s order backend provides a Scale option. Here “1.7x” is selected, which will output the design at 170% of the base pixel size. Selecting a higher scale (up to 10x) increases the output resolution proportionally.
In Qstomizer’s terms, “1X” corresponds to 72 DPI. Scaling by 2X, 3X, etc. effectively increases the DPI by that factor (e.g. 2X corresponds to 144 DPI) Ref.. For example, if the base design area was 100×200 px at 72 DPI, downloading at 2X scale yields 200×400 px at 72 DPI – which is equivalent to 100×200 px at 144 DPI Ref.. Thus, by scaling up and then optionally downsampling externally, you can produce a higher-DPI file (with caution about quality).
- - Exact pixel sizing trick: To get a design at an exact pixel dimension, you often draw the print area smaller in the template and then use scaling. For instance, suppose the goal is a 1500×1600 px final image. Note that Qstomizer’s design canvas max is 800×700 px Ref.. One method is to create the print area 4× smaller (375×400 px) and then download at 4× scale. This produces 1500×1600 px Ref.. (See [4] for a step-by-step example.) After that, a design that is 1500×1600 px at 72 DPI would print at 5×5.3 inches at 300 DPI. You can adjust the factor depending on your needs.
Example:
Achieving a target print size: Imagine you need a front-print design that is 10×14.8 inches on the shirt, to be printed at 300 DPI. You must supply 3000×4440 px (10×300 by 14.8×300). One solution: set the Qstomizer print area to 500×740 px (fits within 800×700) – this is 1/6 of 3000×4440 (rounded). Then download with 6X scale. The downloaded image will be ~3000×4440 px at 72 DPI (since 500×6=3000, 740×6=4440). At 300 DPI printing, that yields exactly 10×14.8 inches. (Without scaling, 500×740 px at 72 DPI would only print ~6.94×10.28 inches.) The key is: pixel dimensions = inches × DPI (here, 10×300=3000 px). Use Qstomizer’s scale factor to reach those pixel dimensions.
Putting It All Together
- - Define your template accurately: Upload a correct-to-scale image, set the measure (ruler) to a known length on the image, then draw the desired print area shape. Ref.
- - Know your printing DPI: Calculate the required pixel dimensions = (print inches)×(printing DPI).
- - Use scale on download: In the backend, choose the scale factor so that (base area width × scale) ≈ desired pixel width. Qstomizer will output the PNG/JPG in pixels Ref. Ref.. For example, a 1× download is always 72 DPI, 2× is effectively 144 DPI, etc.
- - Verify final dimensions: After downloading, check the image’s pixel dimensions. Divide by 72 to see the “inches” it represents in the file. Make sure that matches your product requirements when printing at your chosen DPI (e.g. 300 DPI).
With this approach, the preview in Qstomizer will show a print area scaled correctly (customers see a true-to-scale mockup), and the merchant can download files sized appropriately for production. For more detailed tutorials, see Qstomizer’s knowledge base: “Setting the shape of the printable area” and “Download the design with exact size in pixels” Ref..
References, more information & tools
Qstomizer v3 knowledge base articles on defining print area and downloading designs.
These contain step-by-step instructions and examples that illustrate the pixel/inch relationships explained above.
