How to customize Qstomizer using CSS (colors, buttons and more).
IMPORTANT:
You can customize the appearance of your application using CSS. Please be aware that any changes made through custom CSS are your responsibility, and we cannot guarantee functionality or support for these modifications by default.
If after adding any CSS instructions the application stops working correctly or doesn’t behave as expected, please remove the CSS changes you added before contacting us or making further modifications.
If you need assistance or are unsure how to implement these changes, we offer a dedicated support service available for an additional fee. This service is not free and it is not included by default on any subscription plan.
You can personalise the layout of Qstomizer using pre-defind styles/Themes ( CLICK HERE) or you can create your own custom layout using CSS.
To add your own CSS rules, go ti Settings and then, click on Styles / CSS tab:
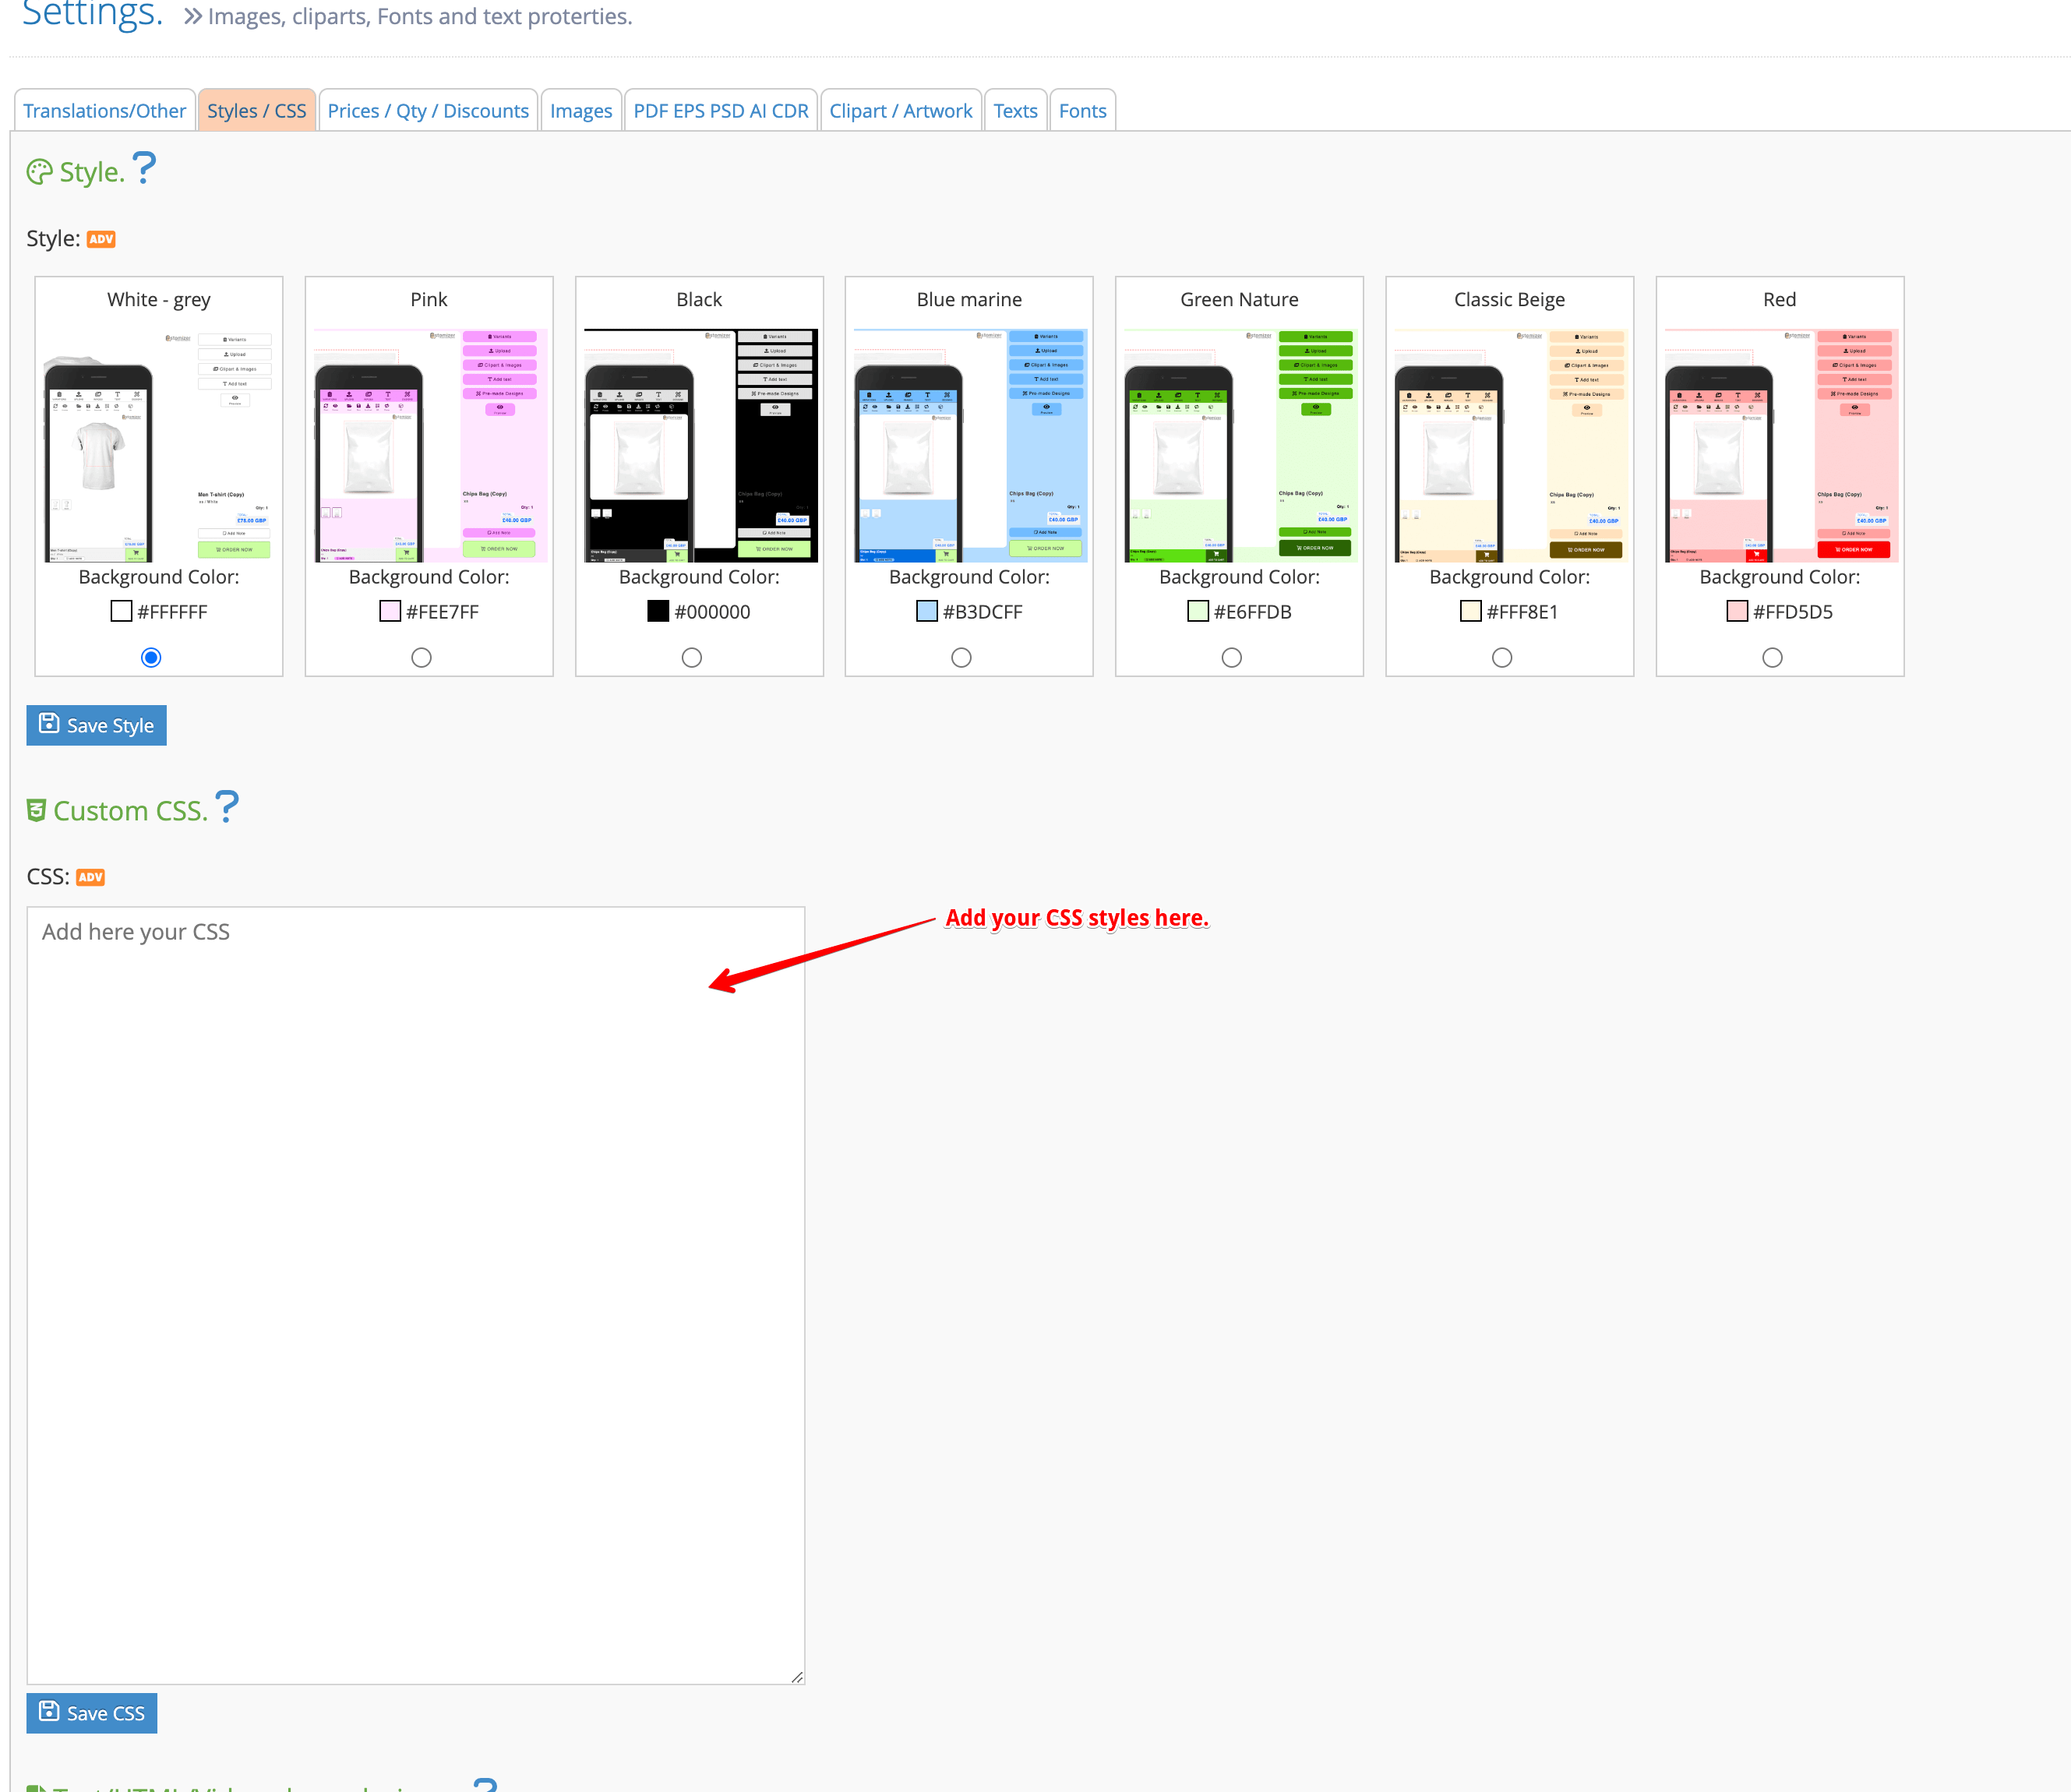
When finished, press the "Save" button to apply your CSS styles.
Examples:
The possibilities for customizing the interface with CSS are virtually limitless. The examples provided here offer just a small glimpse of what’s possible.
1. Changing the color of the buttons:
Imagine that you want to create a button style like this one:
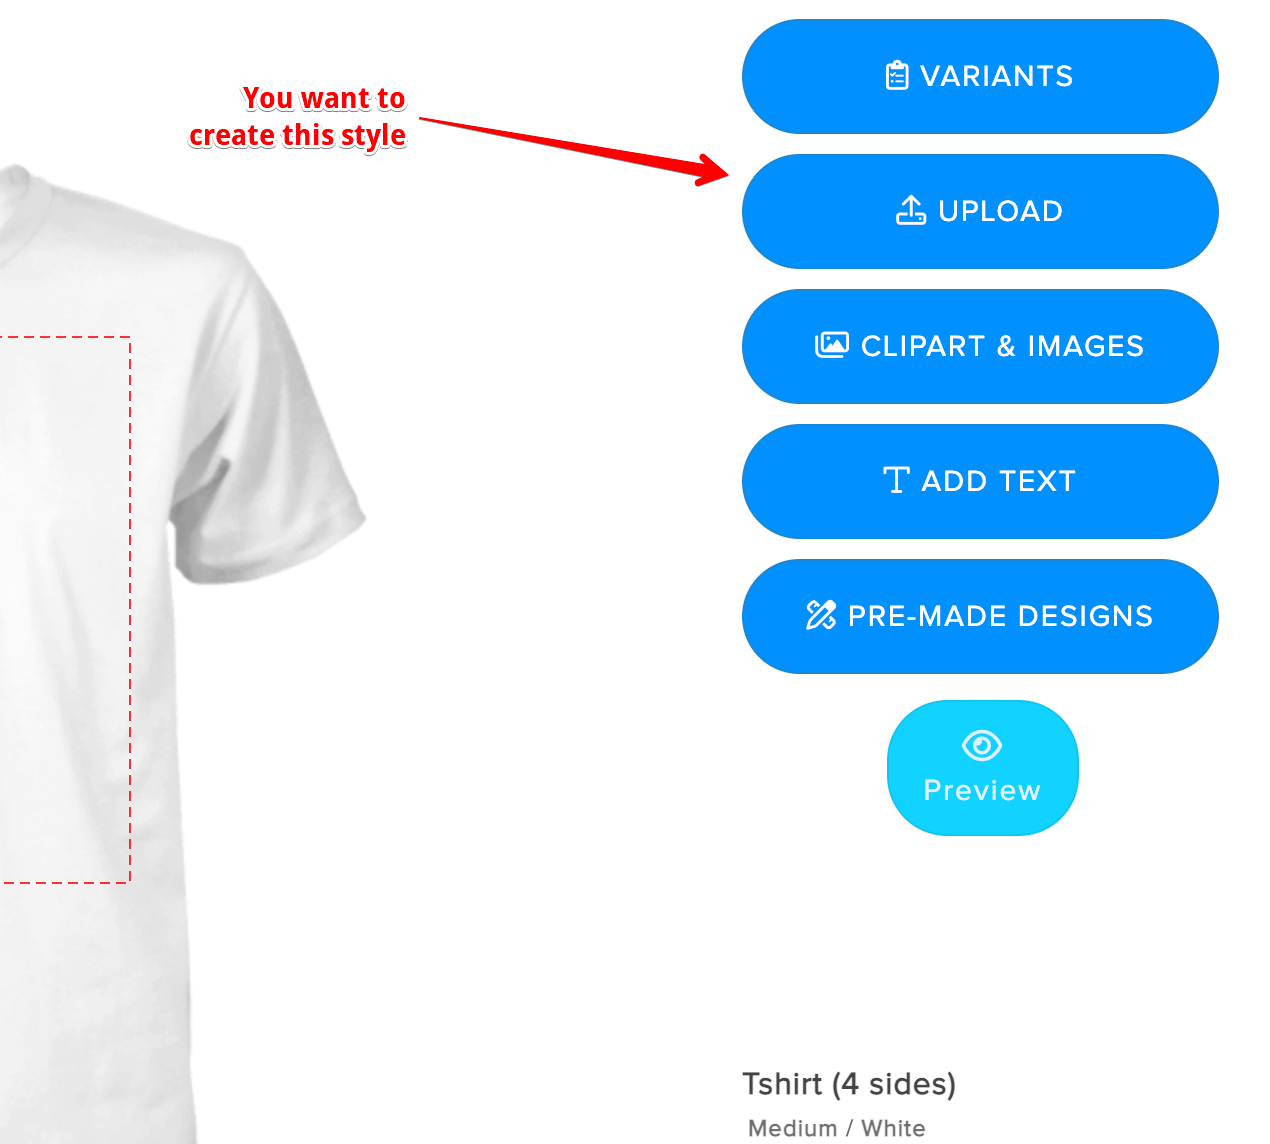
Notice that you can also change the text on the buttons, messages, etc.. by using the translation tool.
You only have to apply this style to the buttons:
                    .qsmzBtnNormal:link, .qsmzBtnNormal:active, .qsmzBtnNormal:visited {
                        border-radius: 30px;
                        font-size: 18px;
                        background-color: #2276db;
                        color: #ffffff;
                        padding: 20px 10px;
                        margin: 10px 0px;
                        border: 1px solid #135eb4;
                        text-transform: uppercase;
                    }
Please note that the layout for mobile devices differs from the desktop version, which means the CSS classes for buttons are also different across these platforms. To change the button color on mobile, you can use the following CSS rule:
                    .qsmzButtonMobile {
                        background-color: #2276db;
                        color: #fff;
                    }
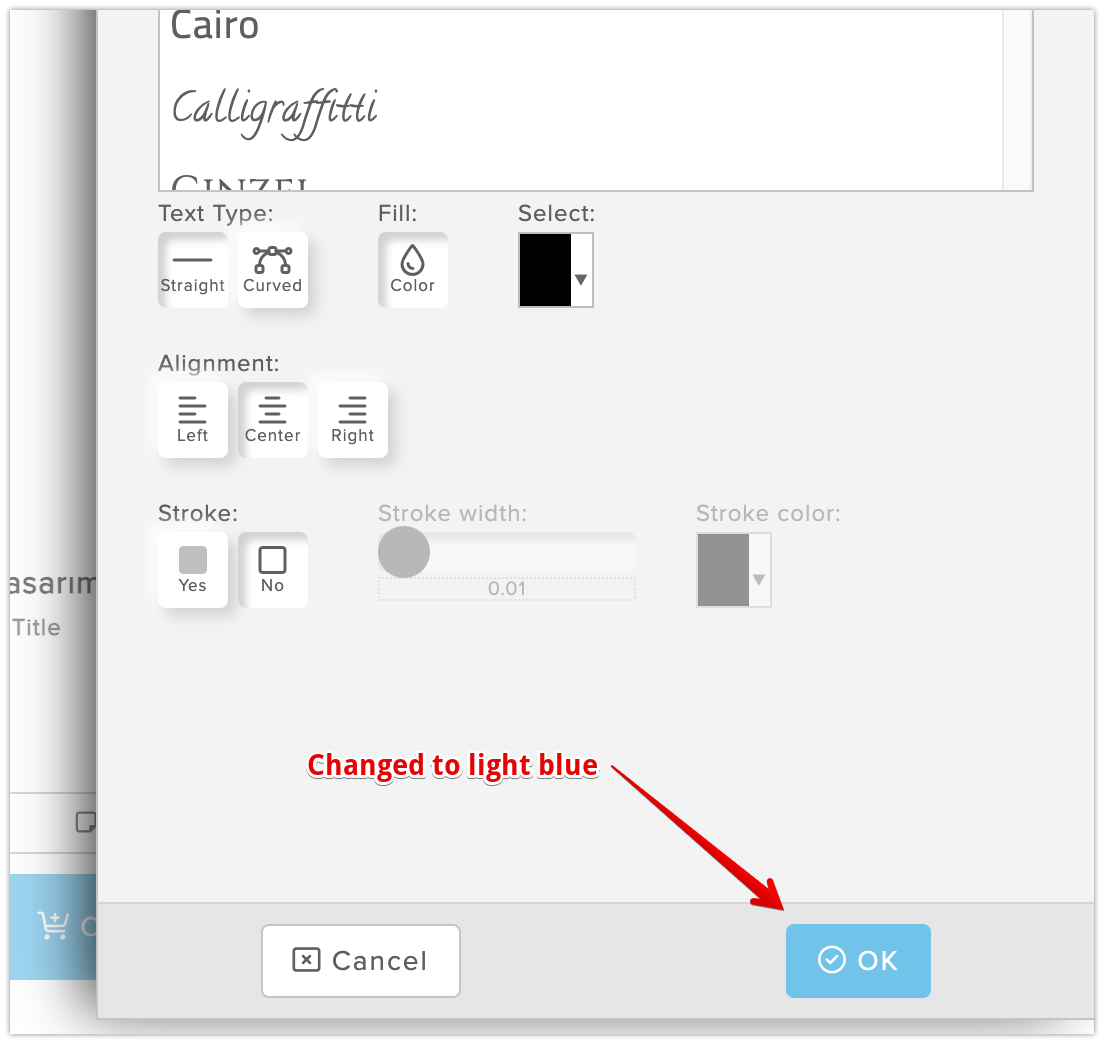
2. Changing the color of the "accept" button in popup windows:
If you want to remove the style of the buttons and change their color, just add this CSS rule:
                    .actionActive, .actionBtnAccept{
                        background-color: #50c5ed !important;
                        border: 1px solid #50c6ed !important;
                        color: #fff !important;
                    }
                    .actionActive:hover, .actionBtnAccept:hover{
                        background-color: #62cbef !important;
                        border: 1px solid #62cbef !important;
                        color: #fff !important;
                    }
.. and this is the result:
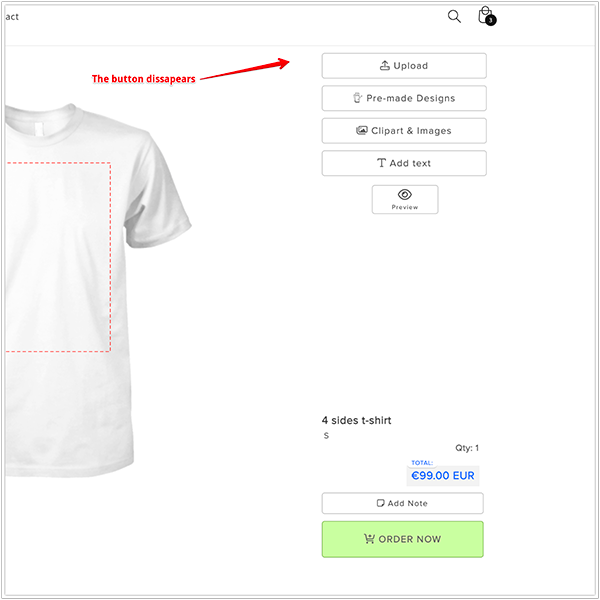
3. Removing the "Variants" Button:
If you want to remove the "Variants" button, just add this CSS rule:
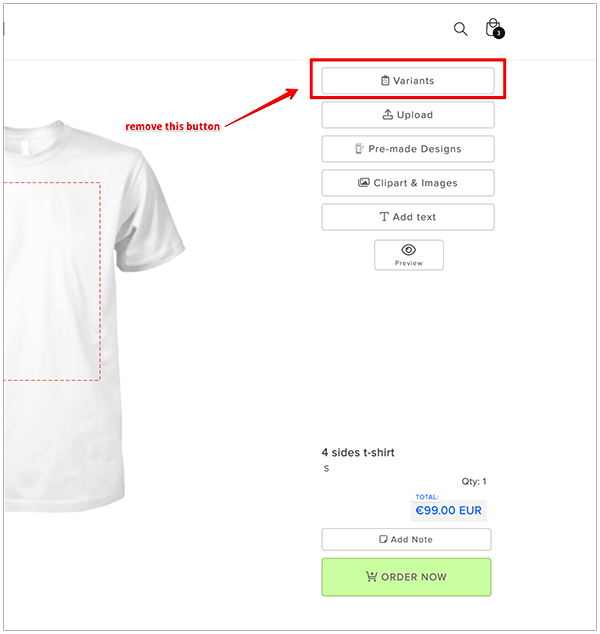
This is the rule to remove it (desktop and mobile):
                    #btnvariations, #btnvariationsmobile {
                        display: none !important;
                    }
.. and this is the result:
4. Reordering the buttons:
We want to change the buttons from the initial order:
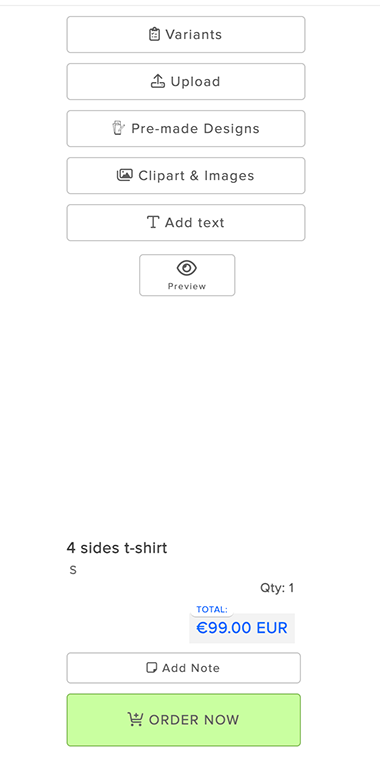
And we want to put the "Pre-made designs" button after the "Add text" button. Just the last one before the "preview" button.
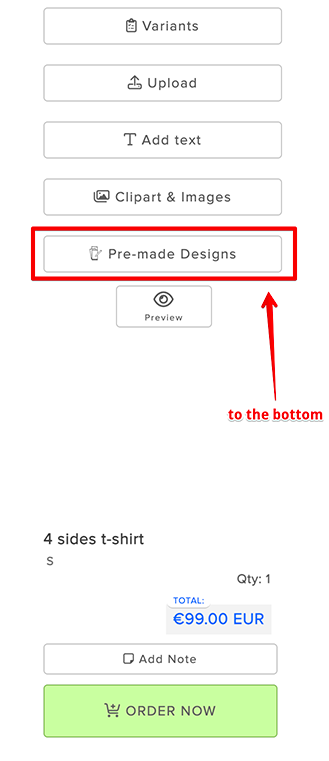
This are the CSS rules to achieve it:
                    .qsmzButtonsContainerSlider {
                        display: flex;
                        flex-direction: column;
                    }
                    #btnvariations {
                        order: 1;
                    }
                    #btnaddimage{
                        order: 2;
                    }
                    #btnaddclipart{
                        order: 3;
                    }
                    #btnaddtext{
                        order: 4;
                    }
                    #btnadddesigntemplates{
                        order: 5;
                    }
                    .actionsLeftContainer{
                        order: 6;
                    }
5. Changing the style of the "Order Now" (desktop) and "Add to cart" (mobile) buttons:
Changing the Order Now button to orange color with the text in white:
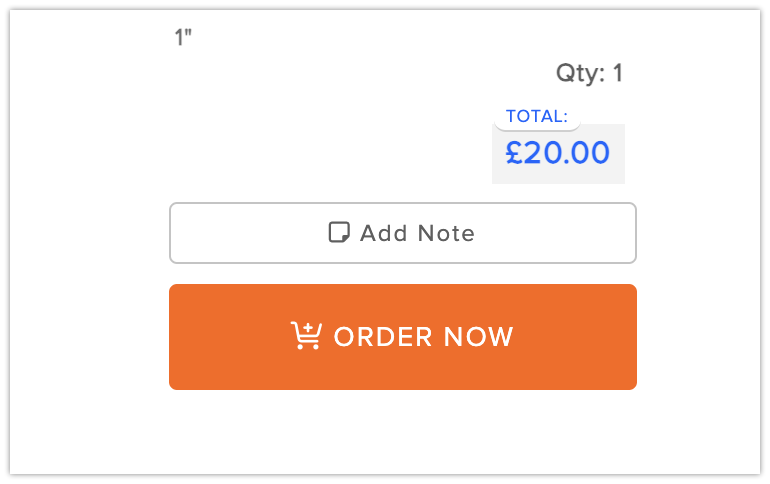
This are the CSS rules to achieve it:
                    .qsmzBtnAddToCart:link,
                    .qsmzBtnAddToCart:active,
                    .qsmzBtnAddToCart:visited {
                        background-color: #ff6400;
                        color: #ffffff;
                        padding: 18px 5px;
                        margin-top: 10px;
                        border: 1px solid #ff6400;
                    }
                    .qsmzBtnAddToCart:hover {
                        background-color: #fc934f;
                    }
                    .btnAddToCartMobileCont{
                        background-color: #fc934f;
                        color: #fff;
                    }
                    .btnAddToCartMobileCont {
                        border: 1px solid #fc934f;
                    }
6. Changing the style of the initial progress bar:
Changing the progress bar to orange:
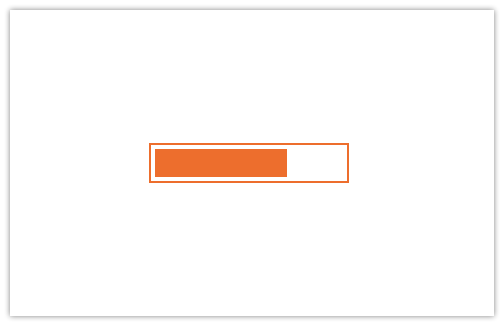
This are the CSS rules to achieve it:
                    .qsmzProgress {
                        border: 1px solid #ff6400;
                    }
                    .qsmzv3ProgressBar {
                        background-color: #ff6400;
                    }
7. Changing the size of the variants icons in the Variants window:
Changing the size to 120px width and 120px height:
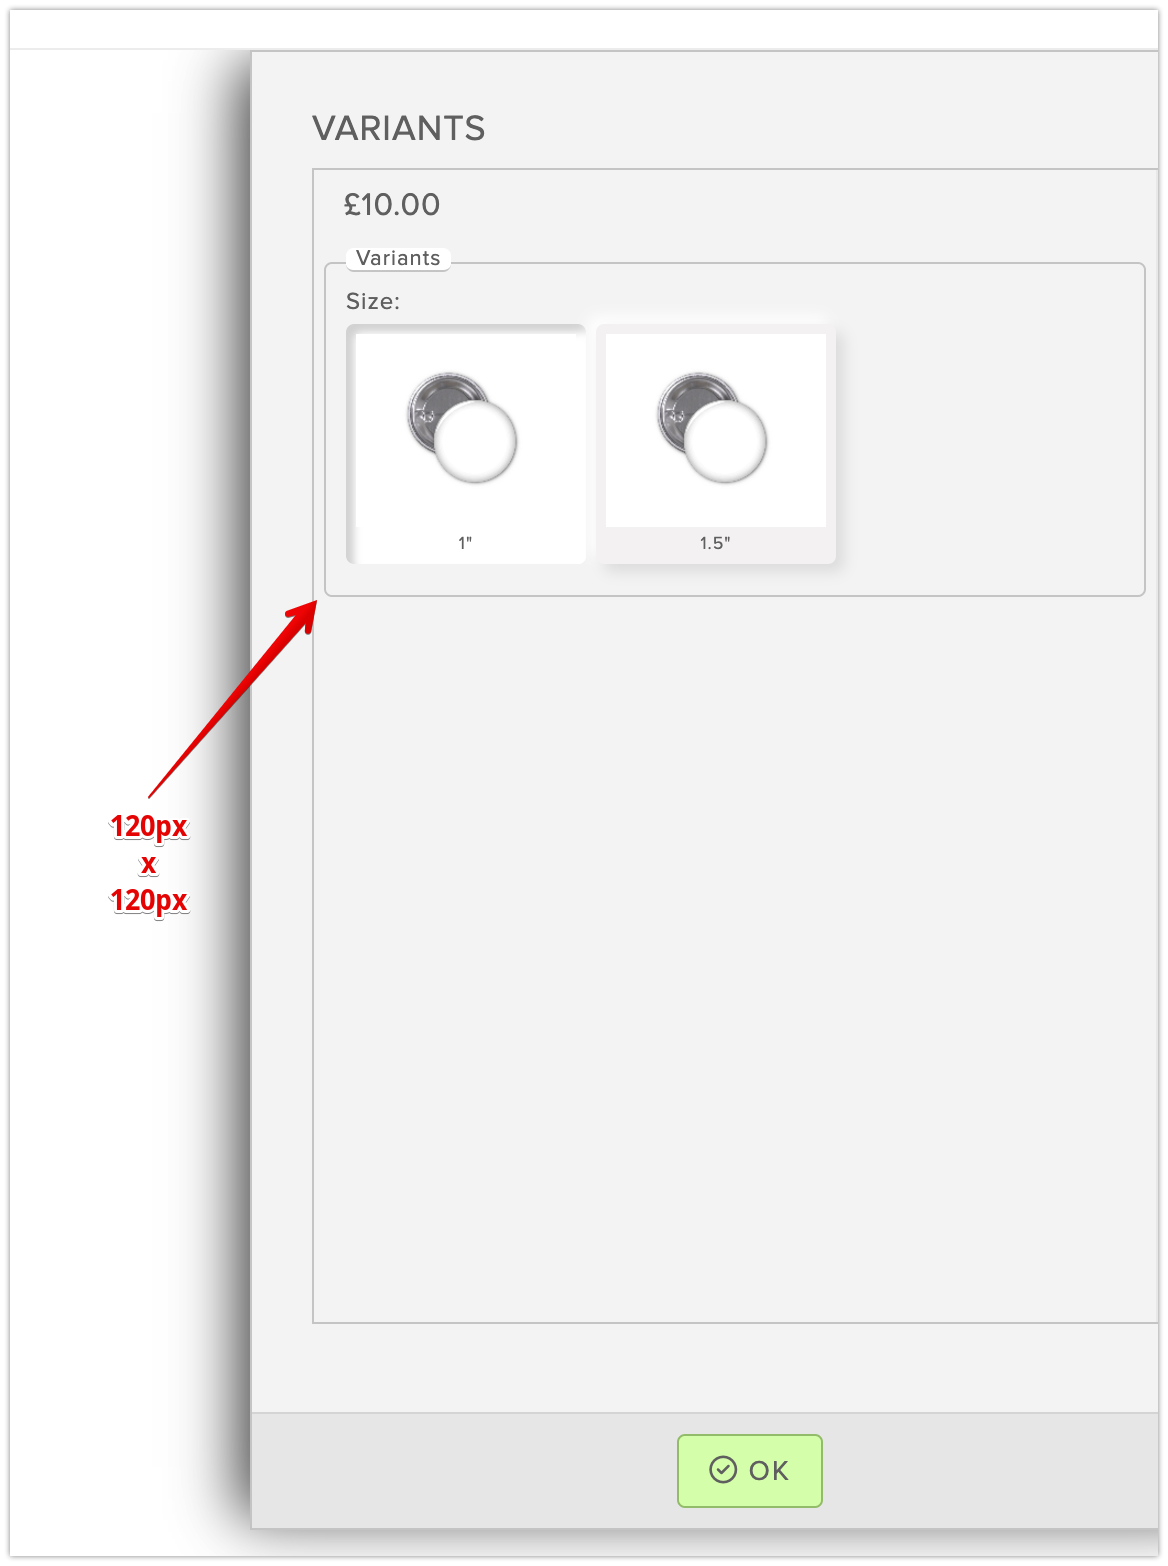
This are the CSS rules to achieve it:
                    .colorVarWrap {
                        width: 120px;
                        height: 120px;
                    }
                    .qsmzColorVariation {
                        width: 100%;
                    }
                    .iconColorVariation {
                        width: 100%;
                    }
8. Reduce the height of the Variants window:
Changing the height of the variants window to a maximum of 540px:
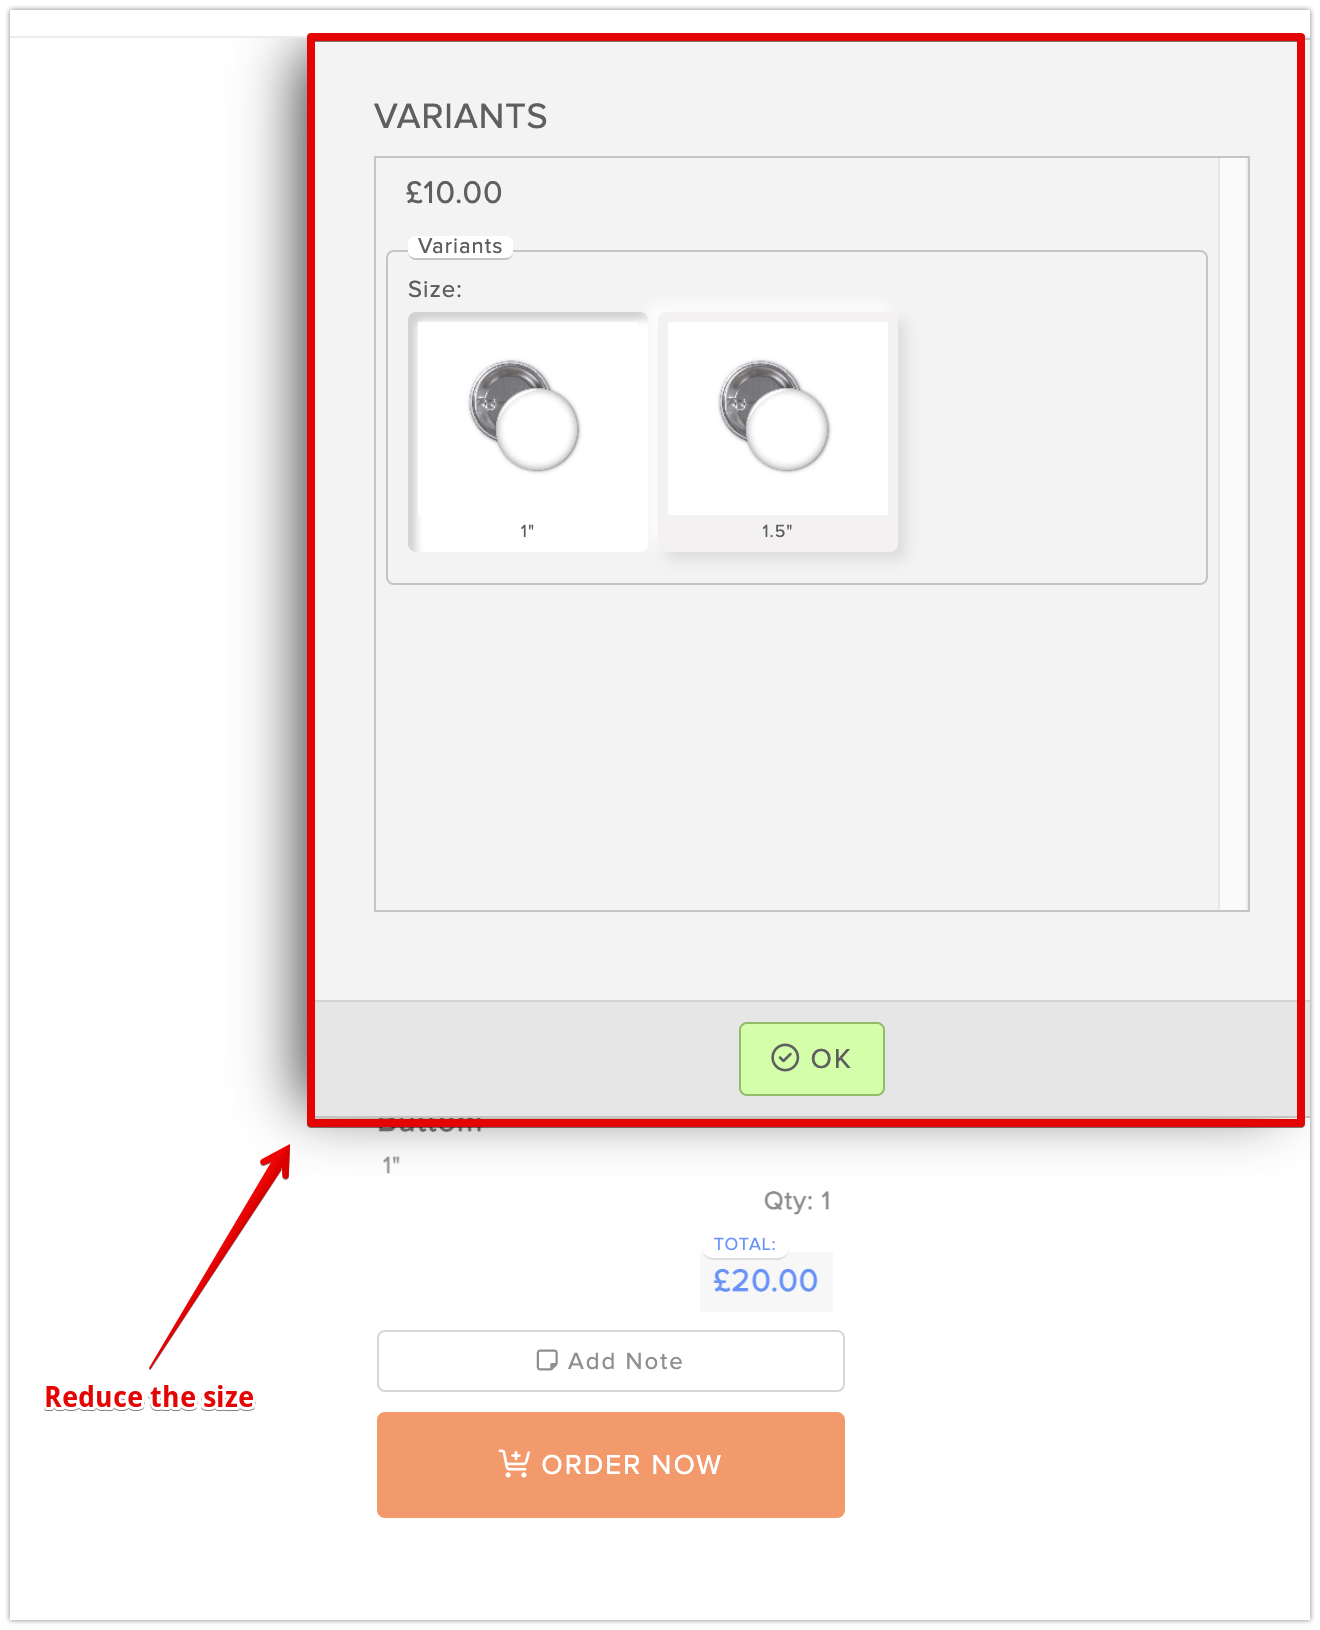
These are the CSS rules needed to achieve this. Note that they will also reduce the size of the window on mobile devices:
                    #qsmzVariationsWindow {
                        max-height: 540px !important;
                    }
9. Remove the "Save/Load" buttons:
Remove the Save and Load buttons on desktop and mobile:
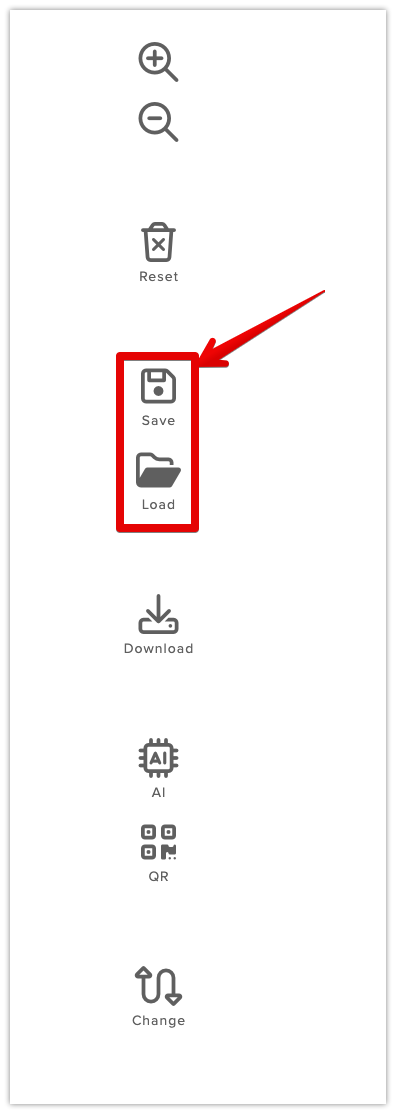
Add this CSS rule:
                    #qsmzDesktopSave,#qsmzDesktopLoad,#btnMobileLoad,#btnMobileSave  {
                        display: none !important;

                    }
10. Adding a text near the '+' icon:
Add a "load More" text near the plus icon:
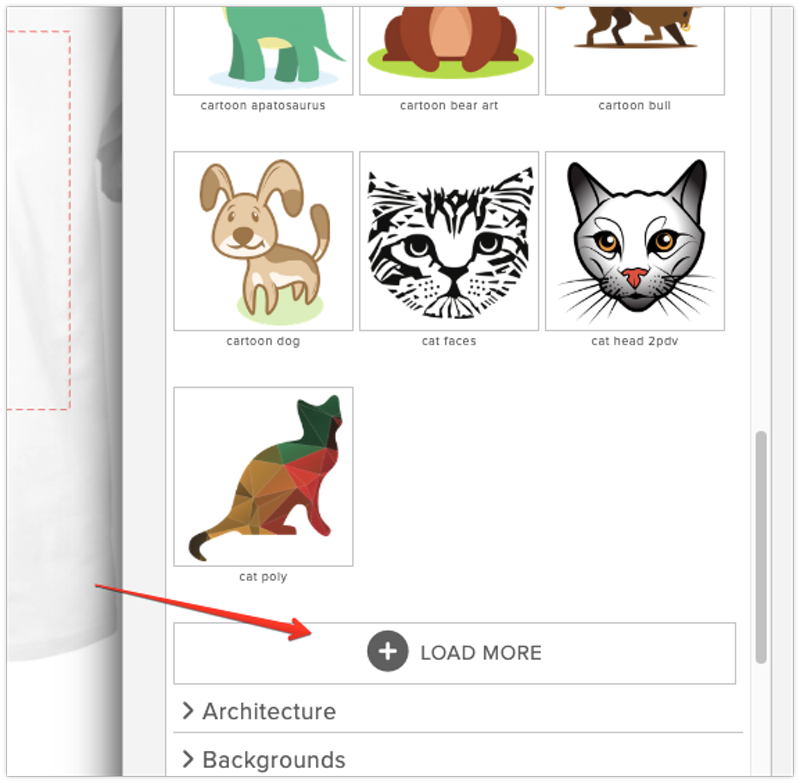
Add this CSS rule:
                    .qsmzStockLoadMore:after {
                        content: 'LOAD MORE';
                        font-size: 15px;
                        top: -5px;
                        position: relative;
                    }
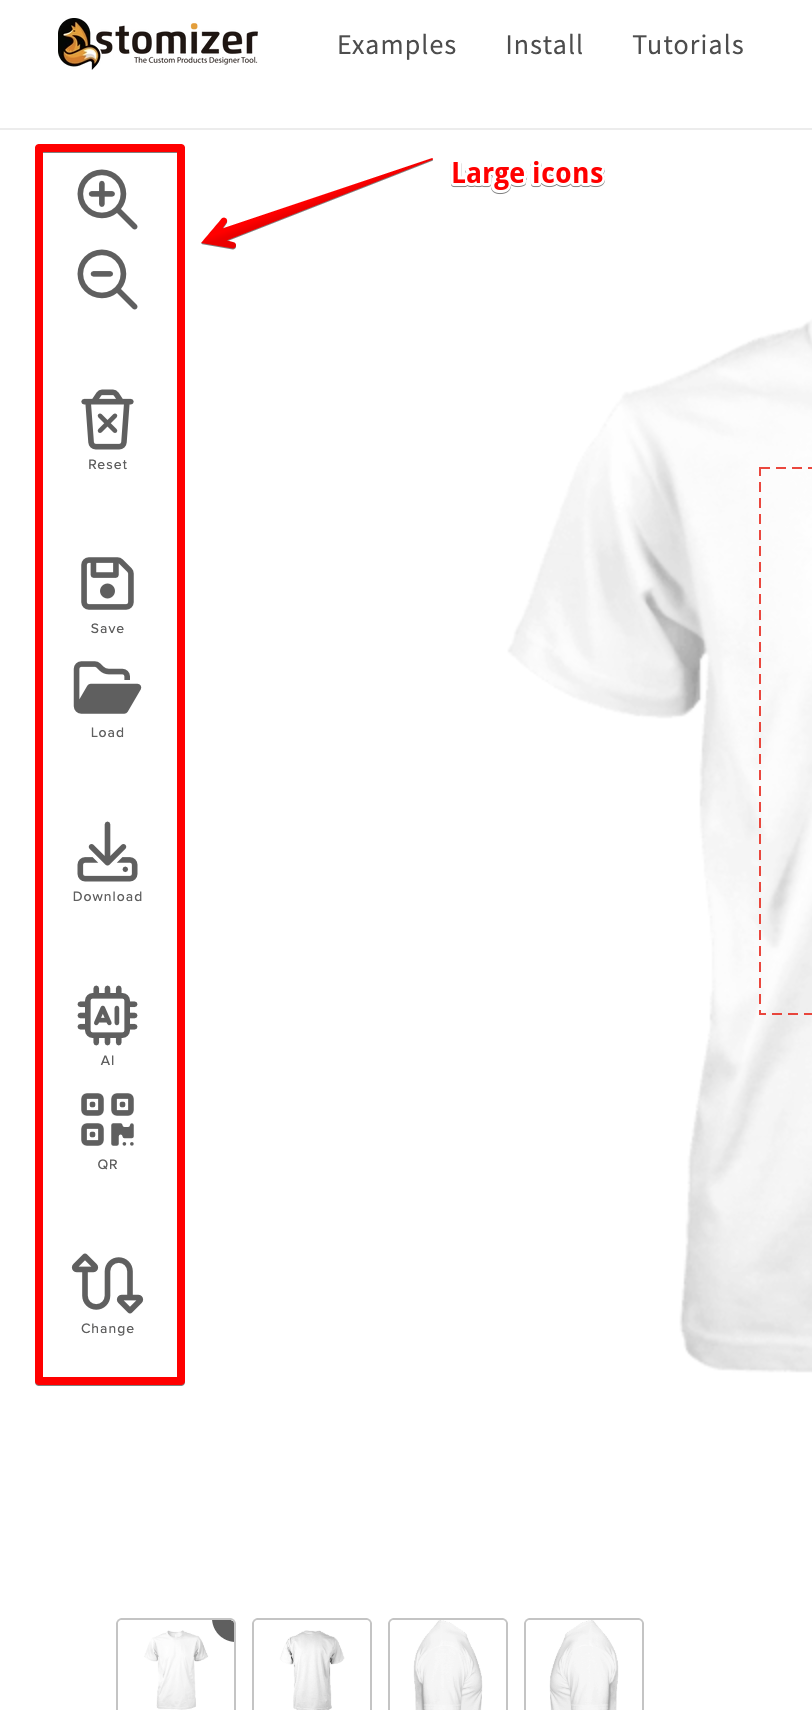
11. Changing the size of the left side bar icons:
You can change the size of the icons in the side bar. For instance, to change the size from 20px to 30px, add this CSS rule:
Add this CSS rule:
                    .qsmzButtonLeft div i {
                        font-size: 30px;
                    }
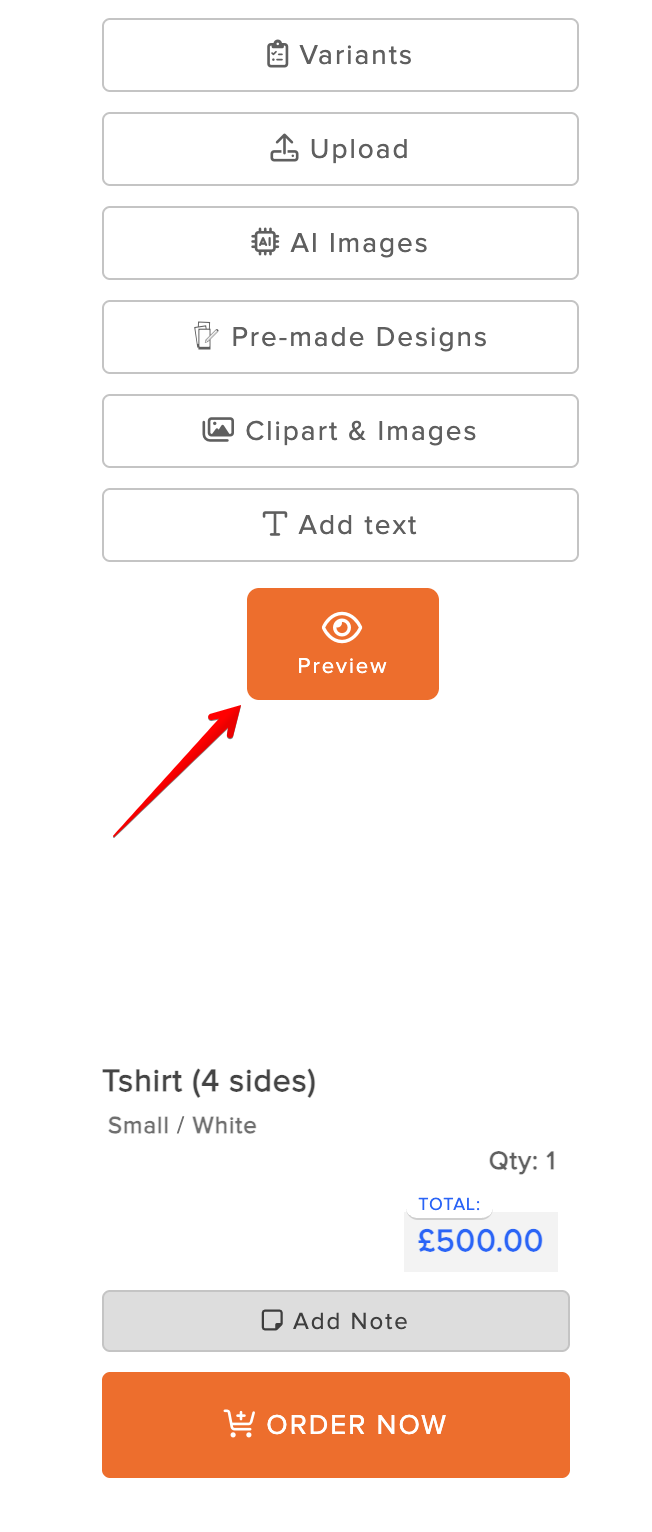
12. Changing the color of the "Preview" button on desktop:
You can change the style of the preview button on desktop by adding these CSS rules:
                    #btnActionPreview {
                        border-radius: 20px;
                        background-color: #ff6400;
                        color: #fff;
                        font-size: 11px;
                        border: 1px solid #ff6400;
                        padding: 10px;
                    }
                    #btnActionPreview:hover {
                        background-color:rgb(185, 74, 0);
                    }
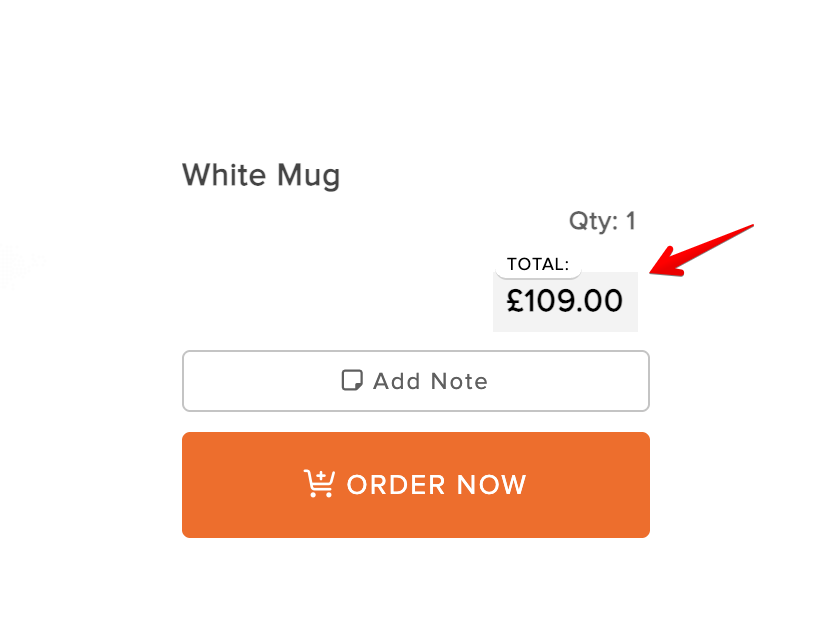
13. Changing the color of the price text of the product on desktop and mobile:
You can change the color of the price (Black) on desktop/movile by adding this CSS rules
                    .txtPriceWrap, .mobilePriceCont, .mobilePrice {
                        color: #000 !important;
                    }
14. Add your logo in the loading bar:
You can add your logo when the app loads just over the loading bar.
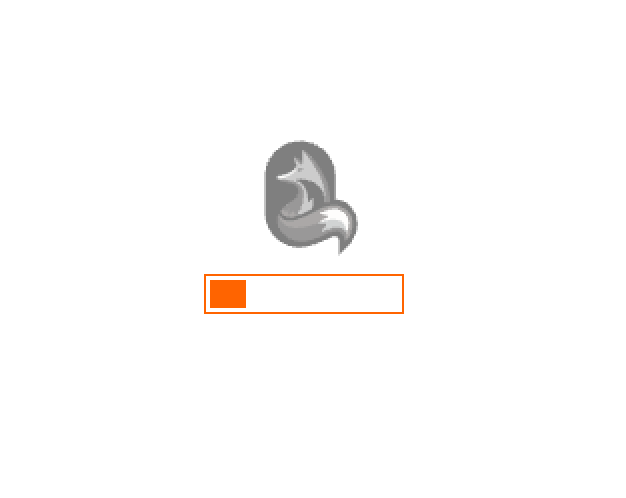
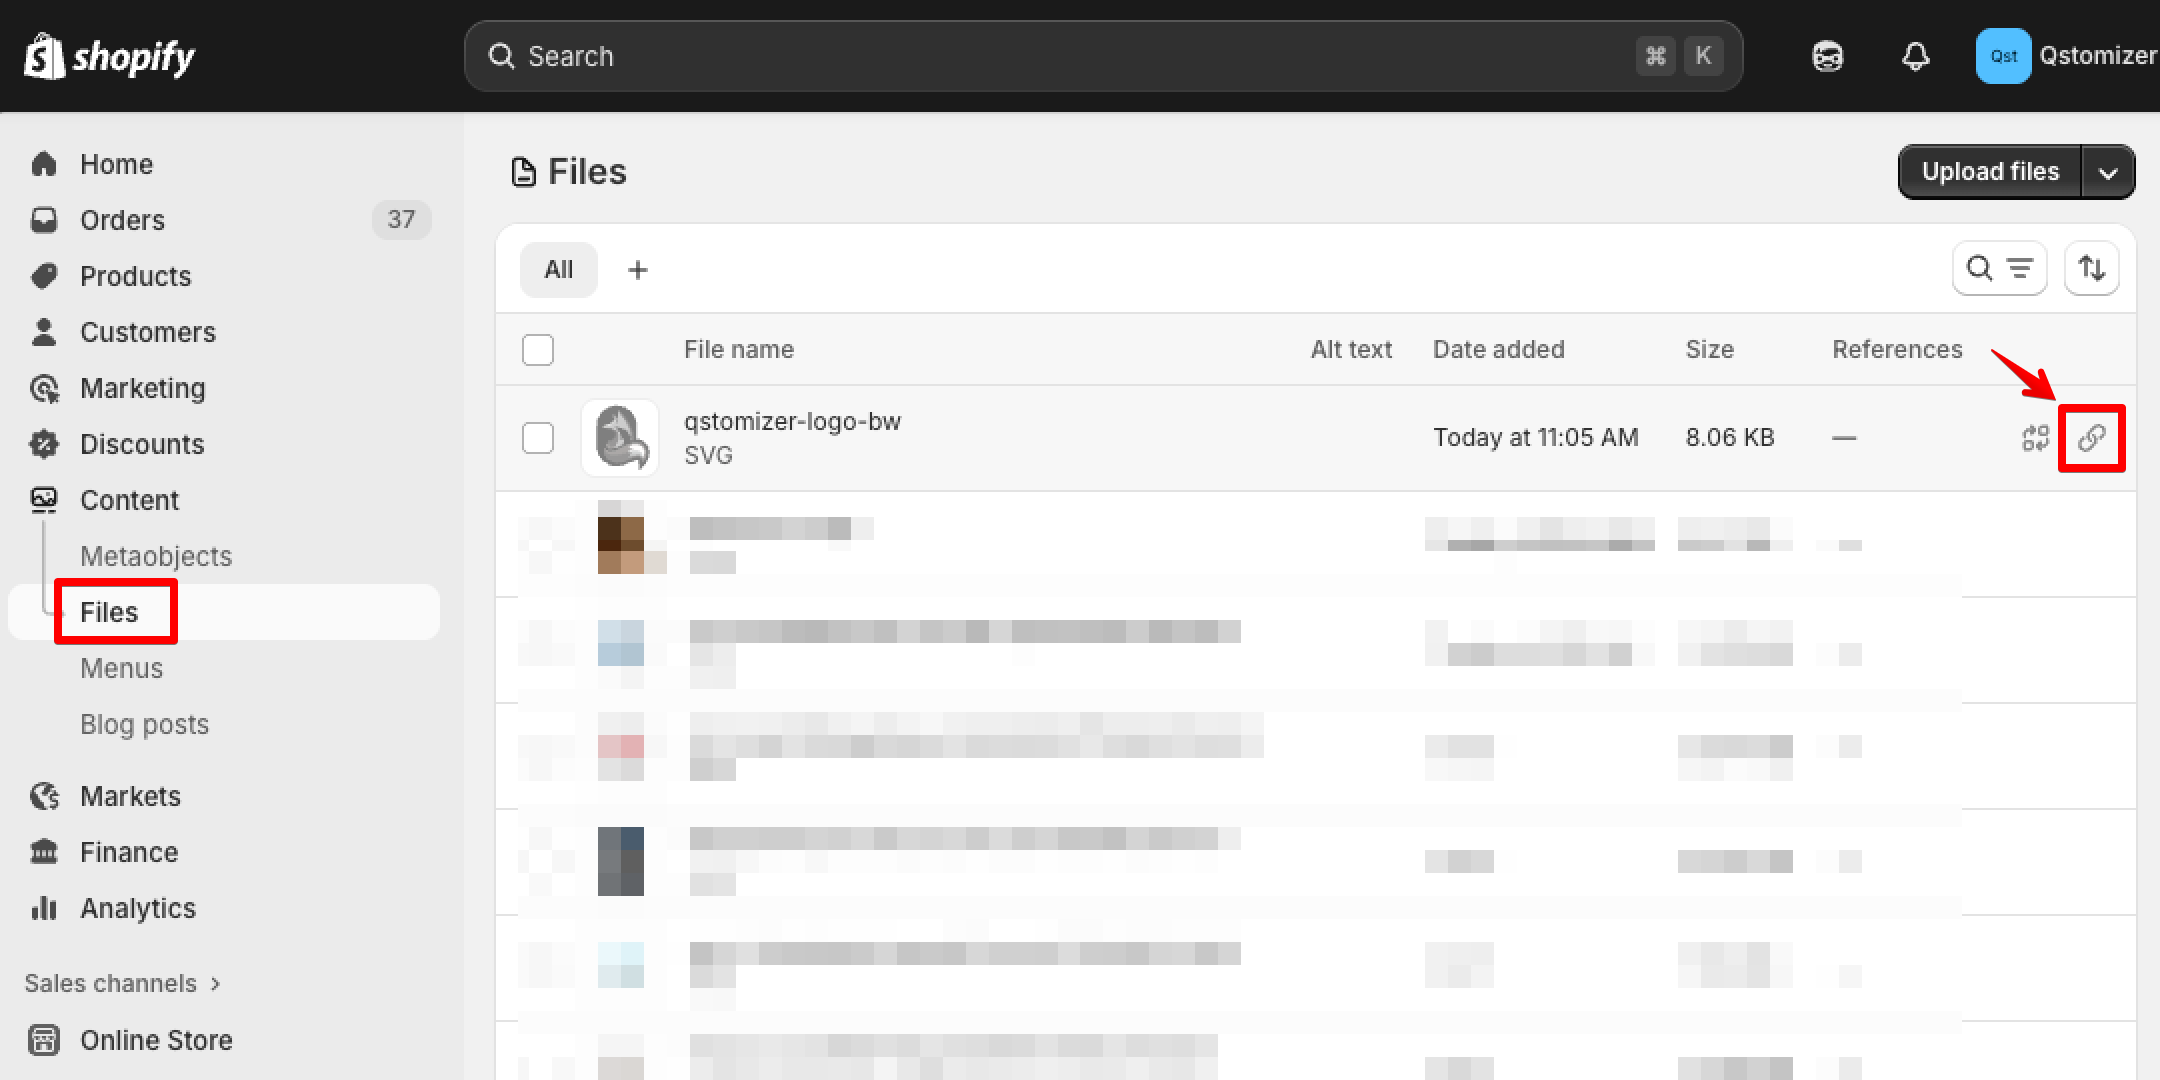
- First, go to the "Content" section of your Shop admin and upload the logo in the Files Section. .
- Once Uploaded, copy the URL of the uploaded image.
- Add the following CSS code.
                    .qsmzSpinnerBoxCont::before {
                        content: "";
                        display: inline-block;
                        width: 60px;
                        height: 75px;
                        background-image: url('https://cdn.shopify.com/s/files/1/0680/9307/files/qstomizer-logo-bw.svg?v=1760108712');
                        background-size: contain; /* o cover */
                        background-repeat: no-repeat;
                        background-position: center;
                        position: relative;
                        top: 10px;
                        left: 16px;
                    }
- Replace the URL in content with the URL of your logo.
- Set the width and heigh and the position of the logo to fit the desired size and position.
Please upload a small image (no larger than 10–20 KB and 100px width/heigh). Ajust the image size to your needs. SVG format is preferred because of its small file size. If the image doesn’t load or takes too long to appear, it’s likely too large — replace it with a smaller version.
15. Adding text under element action buttons
The icons are descriptive enought but if you want to add a text under an element action button, you can use this CSS rule:
Example:
To add the text "Remove BG" under the remove background button:
a#btnActionMiniRemoveBg::after {
    content: 'Remove BG';
    position: absolute;
    font-size: 6px;
    top: 28px;
    left: -4px;
}
.qsmzButtonMobileAction{
top: -4px;
}
This will be the result:
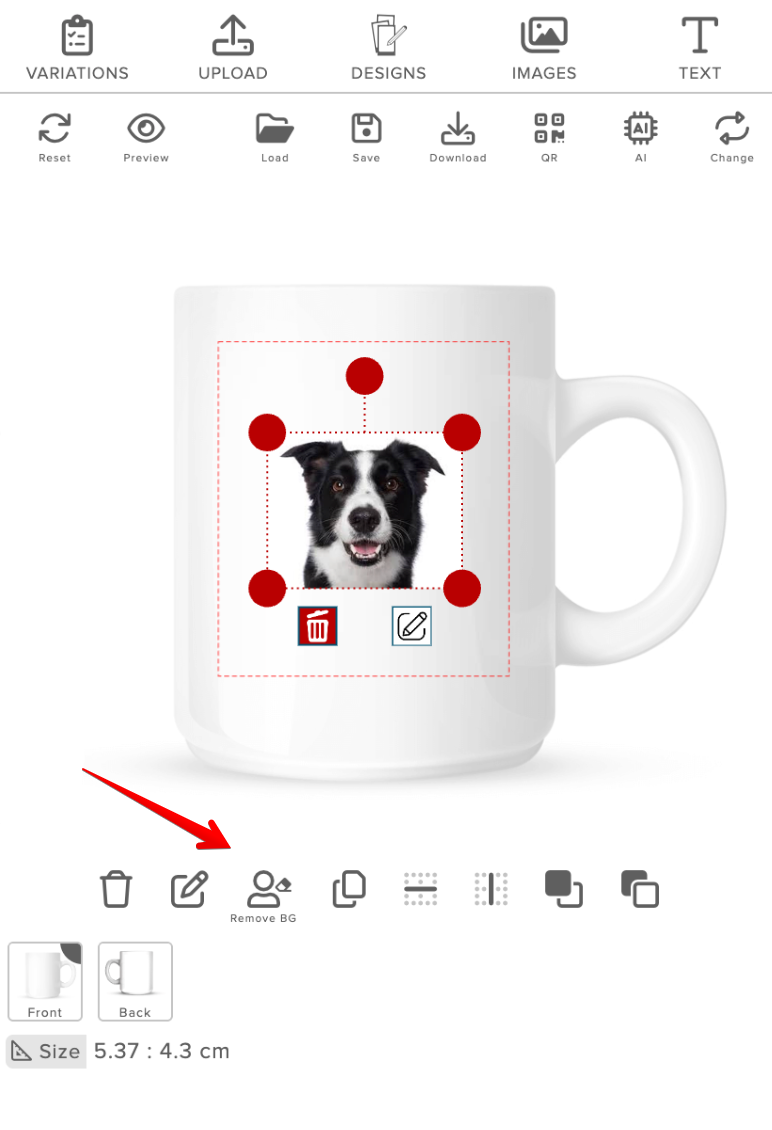
The IDs of the buttons for your reference are:
- Remove: btnActionMiniRemove
- Edit: btnActionMiniEdit
- Remove Background: btnActionMiniRemoveBg
- Clone: btnActionMiniClone
- Vertical Align: btnActionMiniVAlign
- Horizontal Align: btnActionMiniHAlign
- Move forward: btnActionMiniForward
- Move backward: btnActionMiniBackward
Important Note:
If you would like to create a custom layout and require assistance with CSS, feel free to contact us — we’re happy to discuss your needs without obligation. Please note: CSS modifications are not included in any free service. Depending on the complexity and scope of the required changes, additional fees will apply.
