Layout explanation
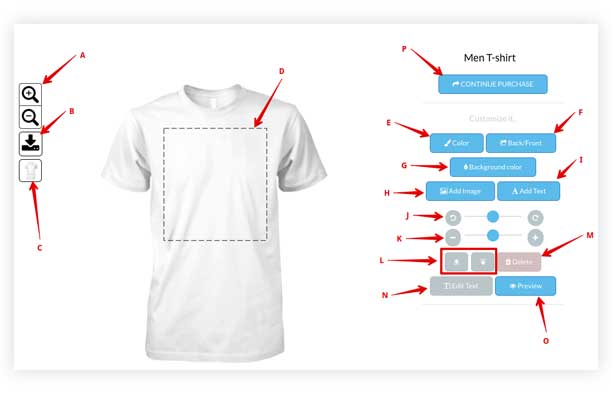
- A: Magnifiers tool. Zoom in / Out
- B: Download button. Saves the design to the local device. To remove it, go to Template Settings > General Tab > Allow Design Download and set it to NO.
- C: Button to change the product. To remove it, go to Settings > "Translation / Other" Tab > "Show an icon in the designer to change product" and set it to NO.
- D: Customizable area of the product. Can be changed in the backend (Template Settings > Modify).
- E: Change the color / variation of the product.
- F: Change the side of the product
- G: Change the background color of the customizable area of the product.
- H: Add clipart, upload image and Instagram.
- I: Add text layer.
- J: Layer rotation tool.
- K: Layer resizing tool.
- L: Buttons to move a layer forward / backward. Put a layer (image/text) over or below another layer.
- M: Remove layer.
- N: Edit Text layer. change color, line spacing, font, etc. of a text layer.
- O: Previsualize the final design
- O: Finish the design, save it and continue the checkout process.
Notice: You can change all the text (buttons, popups, alerts, etc.) by using the translation tool.