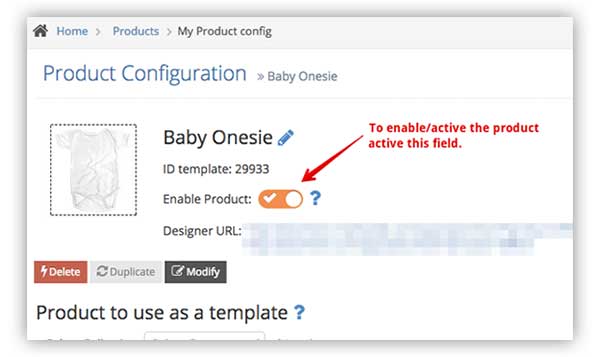


If you have any doubt, visit this link to see how to link/unlink a product to a template or contact us.
There are several solutions to solve or to minify this issue:
1- You can store the products created by the customers in a hidden collection. You only have to follow the instructions here
In this way, all the products created by your customers are automatically stored in a not visible collection, they will not interfere with the pagination of your collections and you will be able to locate them with ease in the backend and delete them when you need it.
2- You can create a pricing rule using the "custom pricing" settings and activate the automatic deletion or unpublish.  In this way, you can automatically remove or unpublish the products from your store after a certain amount of time. For instance, if you set these parameters to remove the products after 24 hours, the products created by your customers will be deleted 1 day after the creation. More info about the pricing rules HERE
3- It is also possible to change the behaviour of the app for not to create the products in the store each time a customer personalises a product. This solution requires custom programming but, if you need it we can study the possibility to add it to your store. More info HERE
You can set the minimum image specs allowed for a product here: http://take.ms/NqbuVS
If you want to set these parameter to all the products, you can set them here in "Ge. Settings":

Anyway, if the image is too small for being printed on the product, the app automatically shows this message:

This is because each color variation must use a different Hexadecimal color. If the hex color is the same, the app can not change the color variation.

In the order list, you can access only to the last 100 customizations made in the shop. But you can access to any older order by using the "extended search" in that page or If you go to the Shopify order page, you can use this link to access to any order made in the past. http://take.ms/crfLz

Notice that all the orders are deleted every three months and the information of those orders can not be recovered.
Notice that you can increase the resolution of an image by scaling it up. I mean, You can use the scaling tool to increase the DPI of an image. For instance, imagine that you need a 800x700 in 150dpi. If you download the 1X image (800x700px) you will get a 72dpi image but if you scale it to 2X (1800x1400px) in 72dpi and reduce it to 800x700px, you will get a 800x700px image with 144dpi. You can scale the image up to 10X or even larger.
Notice that the maximun resolution that you can get is the maximum resolution of the images uploaded by your customers. It is not technically possible to increase the quailty of an image if the image is not good.
The app has a layout of 800x700px so, you can not add a 2800x3200px directly to the layout. You have to scale it down to fit the app layout. For instance, if you scale it down 5 times, the area will be 560x640px that fits in the app layout. then, you have to create a base and a mask image for your product according to that size (560*640px) and create diecut lines with exactly that size:
Then, when you receive an order, you only have to access to the backend and scale up the design 5 times from 560x640px to convert it to 2800x3200px: http://take.ms/k6vMQ 1x is equivalent to 72DPI, 2X to 144DPI, 3X is equivalent to 216DPI and so on...
Notice that the resolution of the downloaded image depends on the resolution of the images uploaded by the customers. It is not technically possible to increase the DPI of an image. For instance, if the customer has uploaded a 72DPI image, it is not possible to generate a 200DPI image. The maximum resolution will be always the maximum resolution of the image uploaded by the customer.
to increase the speed, we recommend you to use as smaller number of fonts as possible. Each font has a size of 250-500kb and they takes a long time to load.
Another way to increase the loading speed is to reduce the base and mask images used to create the product template. We recommend you to use a free tool like this one: https://tinypng.com/
The alert popup is shown based on the size of the customizable area of the product. The popup calculates if the uploaded or resized image is good for being printed on the product. The calculations are based on these fields:

Anyway, you can deactivate the popup alert by setting this parameter to NO in the General or template's page settings: http://take.ms/P15EY

The Qstomizer logo is automatically removed when you subscribe to the Advanced or Profesional Plan
